SmartWEB has different content that can be classified by different criteria for different purposes. Content classification is the process of assigning tags and/or taxonomies to content that can then be used to create navigations, search forms and others.

Taxonomies
Taxonomies represent the formal structure of classes or types of objects. They organize content by using references, making the process of finding related information easier. A taxonomy must:
- Follow a hierarchic format and provide names for each object in relation to other objects.
- Have specific rules to classify or categorize any object.
- Inherit all the properties of the class above it, but can also have additional properties.
Taxonomies are a hierarchical set of terms used to classify content. They differ from tags, as they are controlled, whereas tags can be freely defined. The Orchard Taxonomies module adds a way to manage taxonomies, and assign them to specific content types, thus allowing content classification and filtering.
Taxonomies can be added to a site by enabling the Taxonomies module from Dashboard>Modules (if it is not already enabled). Once enabled, you can create taxonomies and terms, as well as associate the terms to the Content Types by using a Taxonomy Field.
Creation and editing Taxonomies and Terms
To manage taxonomies, navigate to the Taxonomies section via the admin dashboard. A list with all available taxonomies (if any are created) will be presented. To create a taxonomy, press the
Add a taxonomy button.

The following options will be available:
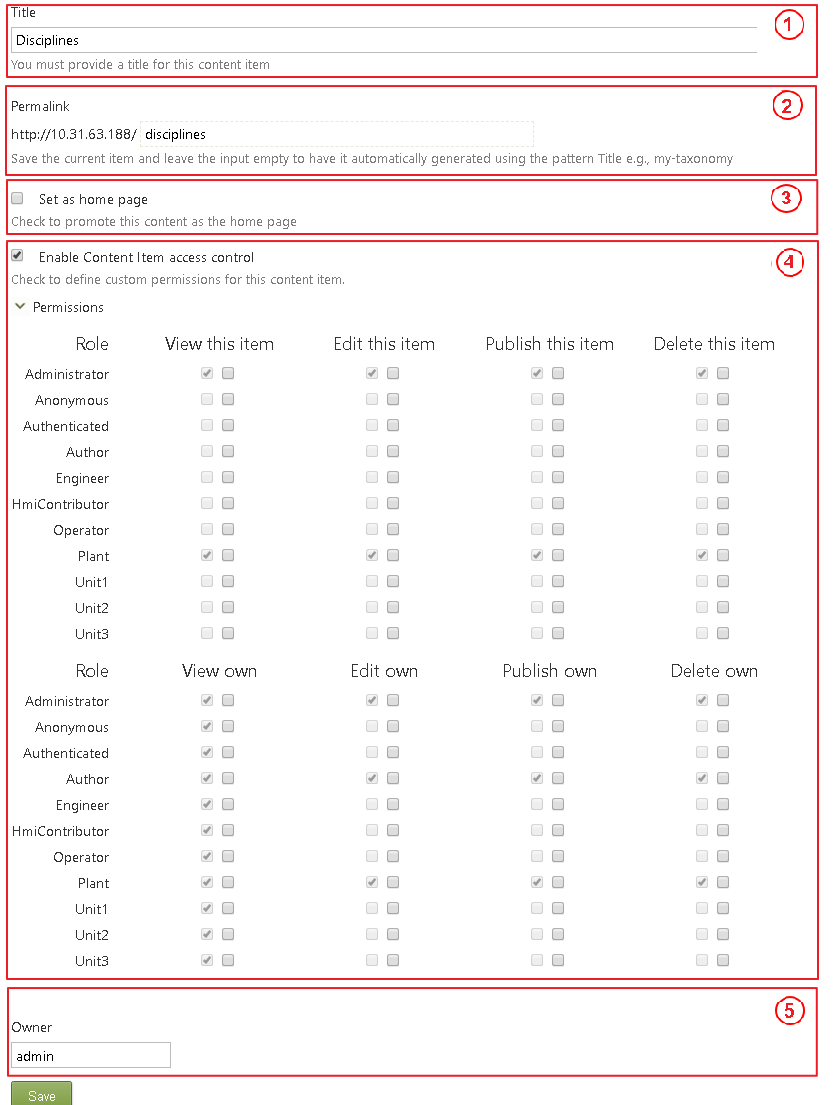
(1) - Enter an appropriate title for the taxonomy.
(2) - Specify the URL for this taxonomy item. If it is left empty, then the URL will be generated automatically.
(3) - Check box to set this taxonomy as the home page of the web site.
(4) - If this option is selected, access rights can be configured. This will determine which users ( with their respective roles) are allowed to see and edit the taxonomy. For more information see chapter Users and Roles.
(5) - The user name of the taxonomy creator is automatically filled in here.
Once the taxonomy is configured, press the Save button to create it.
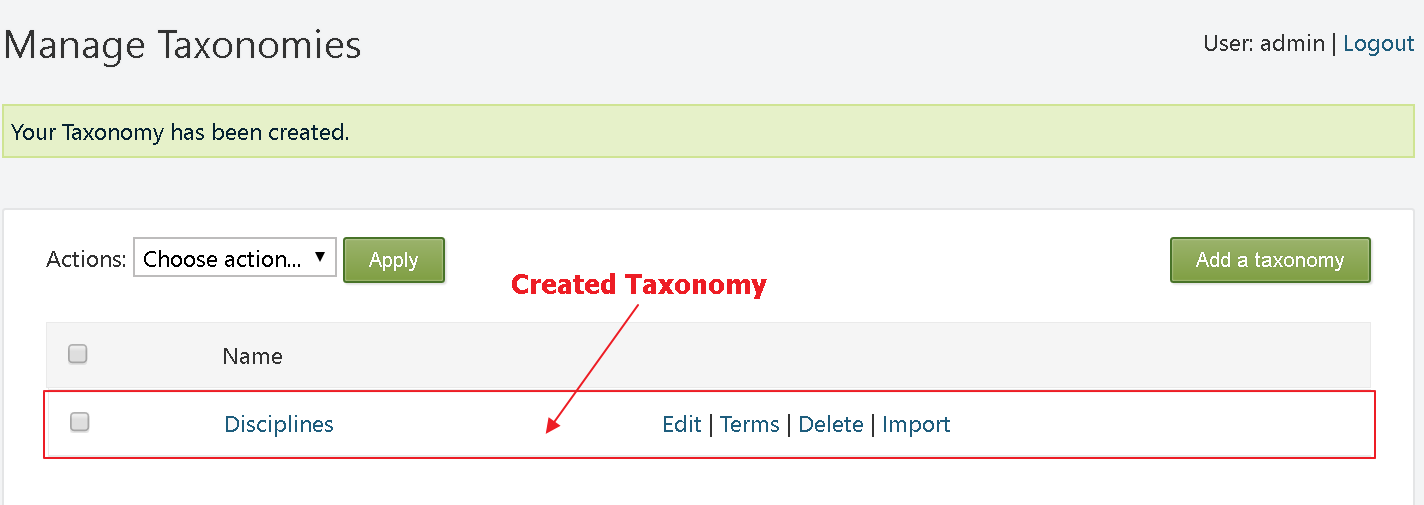
The next step is to create terms for the taxonomy.
The options for each taxonomy consist of: Edit, Terms, Delete, and Import.
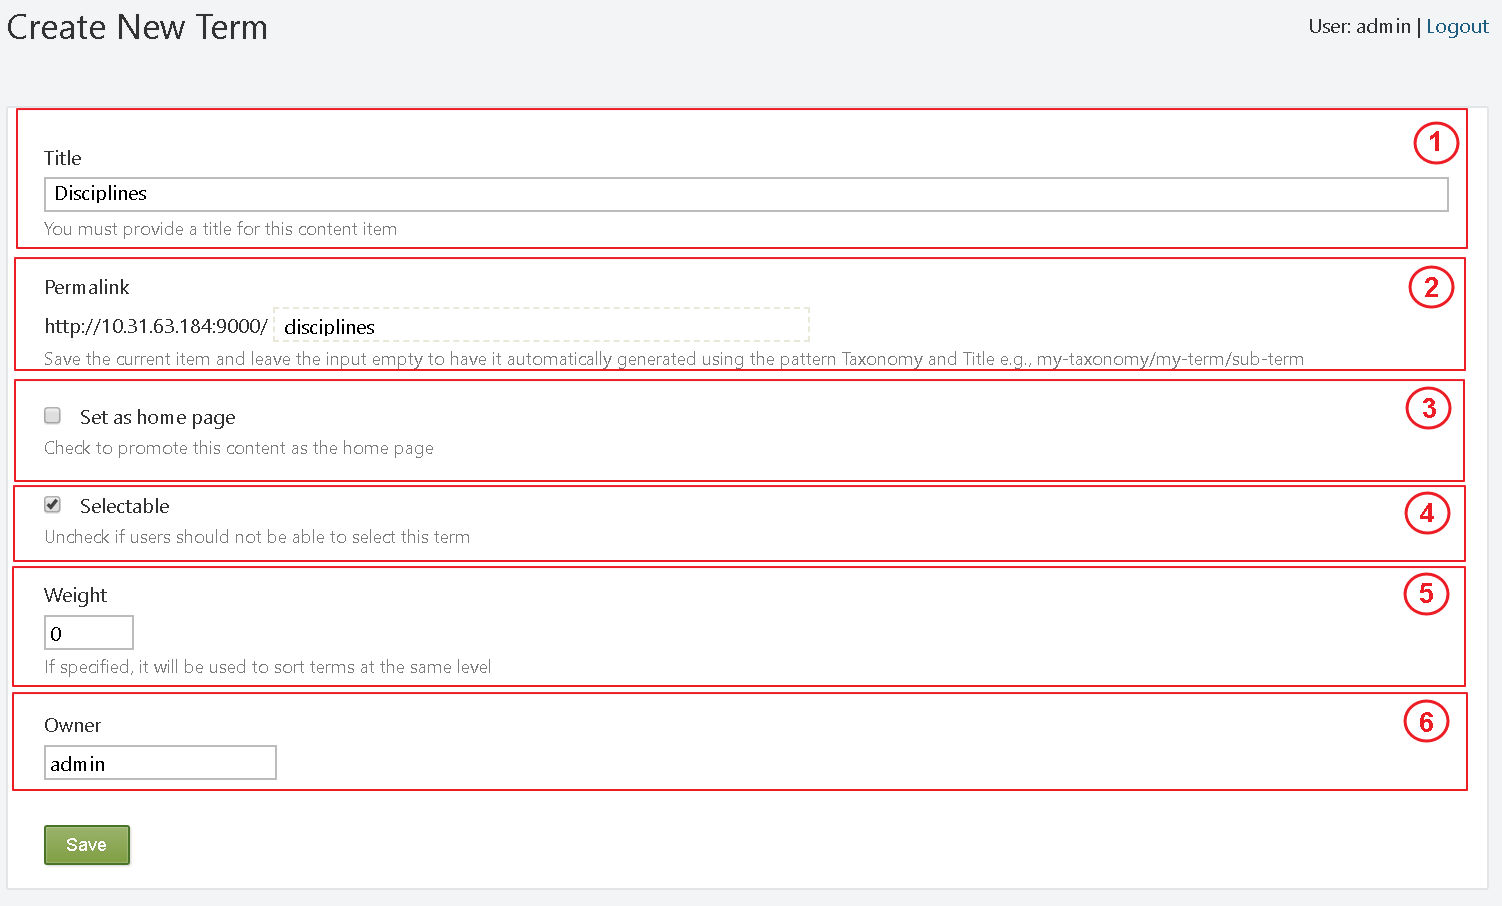
Click the Terms option, then click Add a term in the upper right corner. The following options will be available:
(1) Title - title of the term.
(2) Permalink - the URL of the term.
(3) Checkbox to set the term as home page.
(4) Selectable - uncheck if the user should not be able to select this
page.
(5) Weight - this is the weight for the sort criteria.
(6) Owner - creator of the term.
Example
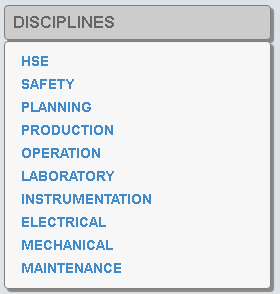
The taxonomy (Disciplines) is now created. It consists of one term (with the
same name - Disciplines) that has ten sub-terms, which are shown on the picture
below. A taxonomy can have multiple terms. Each
term can also have its own terms. The position of the terms does not
depend on their name, but on their weight. The term with the highest weight value is displayed at the top of the tree
structure.

Once a taxonomy has been created, in order to classify different content, it must
be added to the corresponding Content Type. This is done using Fields. When creating or editing a Content Type, click the Add Field
button. Enter an
appropriate Display Name for the field (displayed on the front-end). Enter a
suitable unique identifier (if left empty, the system does it automatically). Finally, select the Taxonomy Field option from the drop-down
menu (Field Type).

Once the Taxonomy Field is added to the Content Type - expand it. The following options will be available:
(1) - Add the content of this field to the selected index.
(2) - Select a taxonomy.
(3) - Restrict selectable elements to leaves (parent/ child terms) only.
(4) - Allow only one term to be selected.
(5) - Check if the field is required.
(6) - Enable auto complete.
(7) - Allow new terms to be created.
(8) - The help text is written under the field when authors are editing
the Content Item.

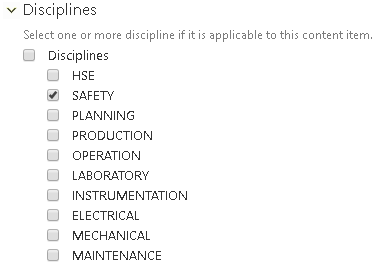
The following image represents how the taxonomy looks on the
Content Item configuration page. The author is free to select one or more disciplines if they are applicable to the Content Item. Alternatively, the author may decide not to select a discipline.
The newly created taxonomy can now be used in the creation of navigation menus. The following image represents how a taxonomy is represented on the front-end:
To remove/delete a taxonomy, select it via its respective checkbox, select Remove from the Actions drop-down list at the top, and click Apply.

Embedded taxonomies
SmartWEB has two built-in taxonomies that are readily available for the classification of different Content Items.
Reminder:
To be able to classify the Content Item, the taxonomy must be added to
the Content Type via a taxonomy field.

Each of these two taxonomies has a subset of terms for the classification
of different Content Items. The terms of the Disciplines taxonomy can be seen in the image below:

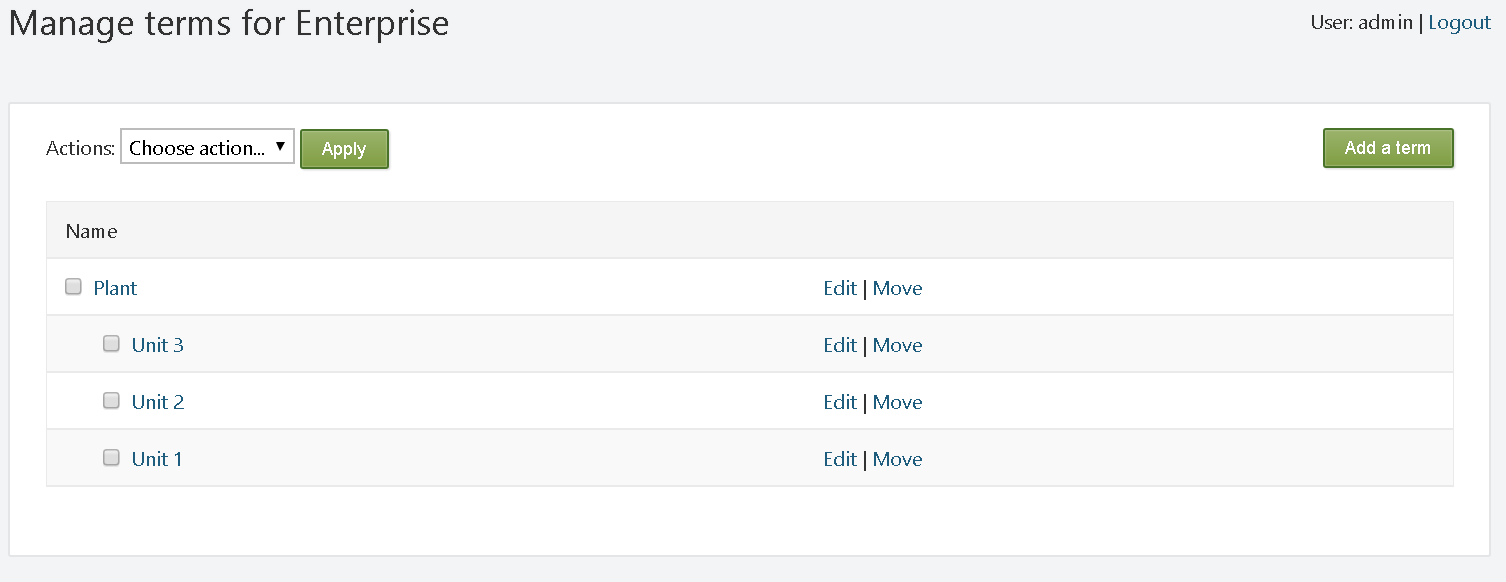
The Enterprise taxonomy has one term - Plant. This term has three sub-terms (Unit 1, Unit 2, Unit 3).
Tags
Tags are small keywords that can be attached to content, and act like labels to tell the website browsers what the content is about. Tags are similar to taxonomies, but they may not be predefined.
Create and edit tags
To create a tag, navigate to Dashboard>Tags. Content with already
created tags, and other respective options, will then be presented. The Apply
and Add Tag buttons are among these options. One way of creating tags is by entering the name for the new tag in the New Tag Name field, and pressing the Add Tag button.

The other way is by adding a Tags part in the Content Type.
Subsequently, when a Content Item of this Content
Type is created, there will be a field where the name of the required tag can be entered. Once the Content Item is created, the tag's name will automatically appear in the Tags section (Dashboard > Tags). Two or more tags can be created at the same time
by separating the tag names with a comma. If a tag is already created,
the Content Item will be attached to it.
The following image provides an example of what the Tags section will look like, after a few tags have been created.
Each tag in this list has a corresponding checkbox. These checkboxes are used for the selection of one or several tags. Once selected, they can
be deleted via the Delete option from the drop-down menu (Actions:), and its execution via the Apply button.
