In SmartWEB, a widget is a fragment of UI (such as HTML) and code (such
as a content part) that can be easily mapped to any
location or zone in the active theme, such as a sidebar or
footer zone. Examples of widgets include: navigation menus, HMI displays,
and others.
To manage widgets in SmartWEB, navigate to Dashboard>Widgets . The
Widgets page presents the available widgets, and can be used to assign a
widget to a layer and a zone.
A layer can be defined as a set of rules for displaying a widget (or a
group of widgets). In other words, a widget can be displayed by a layer on a specific page, only for users that have access to the content on that page. The zone dictates where the widget will be positioned on the page.
The following is an image depicts the Widgets section.

Whenever a widget becomes available (usually by enabling another feature
in the Features tab in the Modules section), SmartWEB
will add it to the list of available widgets that can be added to zones in
the current theme. To see the list of available widgets in a zone, click the Add button on one of the listed zones in
the Widgets section.
For example, to add a header, click the Add button for the Header zone. A
screen is displayed that allow you to choose one of the available
widgets.

The following table describes the widgets that are available by default
in SmartWEB:
| Layer | Rule | Description |
|---|---|---|
| Default | true | Always displayed on every page. |
| Authenticated | authenticated | Displayed if the user is authenticated. |
| Anonymous | not authenticated | Displayed if the user is anonymous. |
| Disabled | false | Not displayed. This layer is provided as way to save the configuration of widgets that are not currently displayed. |
| The Homepage | url("~/") | Displayed on the home page. |
| SmartWeb All | true | The widgets in this layer are displayed on all pages. |
| Default | true | The widgets in this layer are displayed on all pages. |
SmartWEB comes with a number of layers already defined. You can define
additional layers as needed, as discussed later in Adding a Layer. In
the Widgets screen, you can edit the existing layers by selecting a
layer in the Current Layer drop-down list, or you can add new layer by
clicking Add a new layer. The following table lists the default layers,
shows the rule that defines the layer, and describes the effect of the
layer.
| Layer | Rule | Description |
|---|---|---|
| Default | true | Always displayed on every page. |
| Authenticated | authenticated | Displayed if the user is authenticated. |
| Anonymous | not authenticated | Displayed if the user is anonymous. |
| Disabled | false | Not displayed. This layer is provided as way to save the configuration of widgets that are not currently displayed. |
| The Homepage | url("~/") | Displayed on the home page. |
| SmartWeb All | true | The widgets in this layer are displayed on all pages |
| Default | true | The widgets in this layer are displayed on all pages |
In SmartWEB, a web page is divided into zones (regions). The available
zones are defined by the website\'s theme. In the Widgets
section, the user has access to a list of all zones available for the currently
selected layer. The list also shows the widgets assigned to each zone
for the selected layer.
Adding a Layer
To add a layer, navigate to the Widgets section. Click the Add a new layer link. The Add Layer screen will then be displayed:

To create the new layer, enter the name of the layer, a description, and
the rule that defines the layer. Finally, click Save.
The Layer Rule value is an expression that resolves to either true or
false. If it resolves to true - the widget is displayed, otherwise the
widget will remain hidden.
The following table summarizes the syntax for building Layer Rules.
| Rule Syntax | Module | Description |
|---|---|---|
| url(" |
Orchard.Conditions | True if the current URL matches the specified path. If an asterisk (*) is added to the end of the path, all pages found in subfolders under that path will evaluate to true (for example, url("~/home*")). |
| authenticated | Orchard.Conditions | True if the user is logged in. |
| ContentType(" |
Orchard.Widgets | True if the content type that is being viewed matches the content type specified e.g. Content Type("Page") |
| swMatchUserAgent(params object[] patterns) | Smartsys.LayerRules | Matches user agent header against provided patterns. Operation returns true if one of the patterns has a match |
| swIsMobileAgent() | Smartsys.LayerRules | Matches user agent name and version against default and custom patterns if provided. Operation returns true if one of the patterns (default or custom) has a match |
| swMatchRegex(string input, string pattern) | Smartsys.LayerRules | Matches provided input against provided pattern |
| swUserInRole(params object[] roles) | Smartsys.LayerRules | Checks if user belongs to one of the provided roles. Operation returns true if the user belongs to one of the roles |
| swUrl(string pattern) | Smartsys.LayerRules | Matches url against provided pattern |
| not (!) | n/a | Logical Not |
| and (&) | n/a | Logical And |
| or () | n/a | Logical OR |
| null (nil) | n/a | null |
| >,<,>=,>=,== | n/a | Comparison operators |
Example
Create a layerthat will have its elements be visible once the user is
authorized, his role is Administrator, and does not use a mobile
device.

note
In SmartWEB, the widgets within the zone can come from multiple layers,
but one widget can only be assigned to a single layer and if you want to use any
conditions, the module responsible for it must be enabled.
Create custom widget
The process of creating a custom widget is demonstrated by creating a Hmi
Widget. Since the widgets are Content Items, the first step in their
creation is to create a Content Type. From the Dashboard click on the Content
Definition link, and click the Create new type button. Set a
suitable name, and a technical name for the Content Type. The technical
name of the Widget is used for CSS classes and alternates. Finally, click the
Create button. For more information about Content Type.

You will then be given an option to select the parts for your Content Type.
For the example, click Save. The parts will be added in the next stage.
The following screen should now be visible:

(1) Content Type Id
(2) Choose where and if the content should be indexed, and which version should be indexed. Two versions are available: the latest version, and the published version.
(3) Determines if an instance of this Content Type can be created
through the UI.
(4) Determines if this Content Type supports draft versions.
(5) (Optional) The stereotype of the Content Type. e.g., Widget,
MenuItem, ...
(6) Fields and Pars-- add Fields and Parts
Once the widget has been configured and saved, it can then be used.
Assigning a Widget to a Zone
To assign a widget to a zone, click the Add button on the zone that you
want to add the widget to, and then select the widget that you want to add.
For example, click the Add button for the Header zone and select Html Widget.
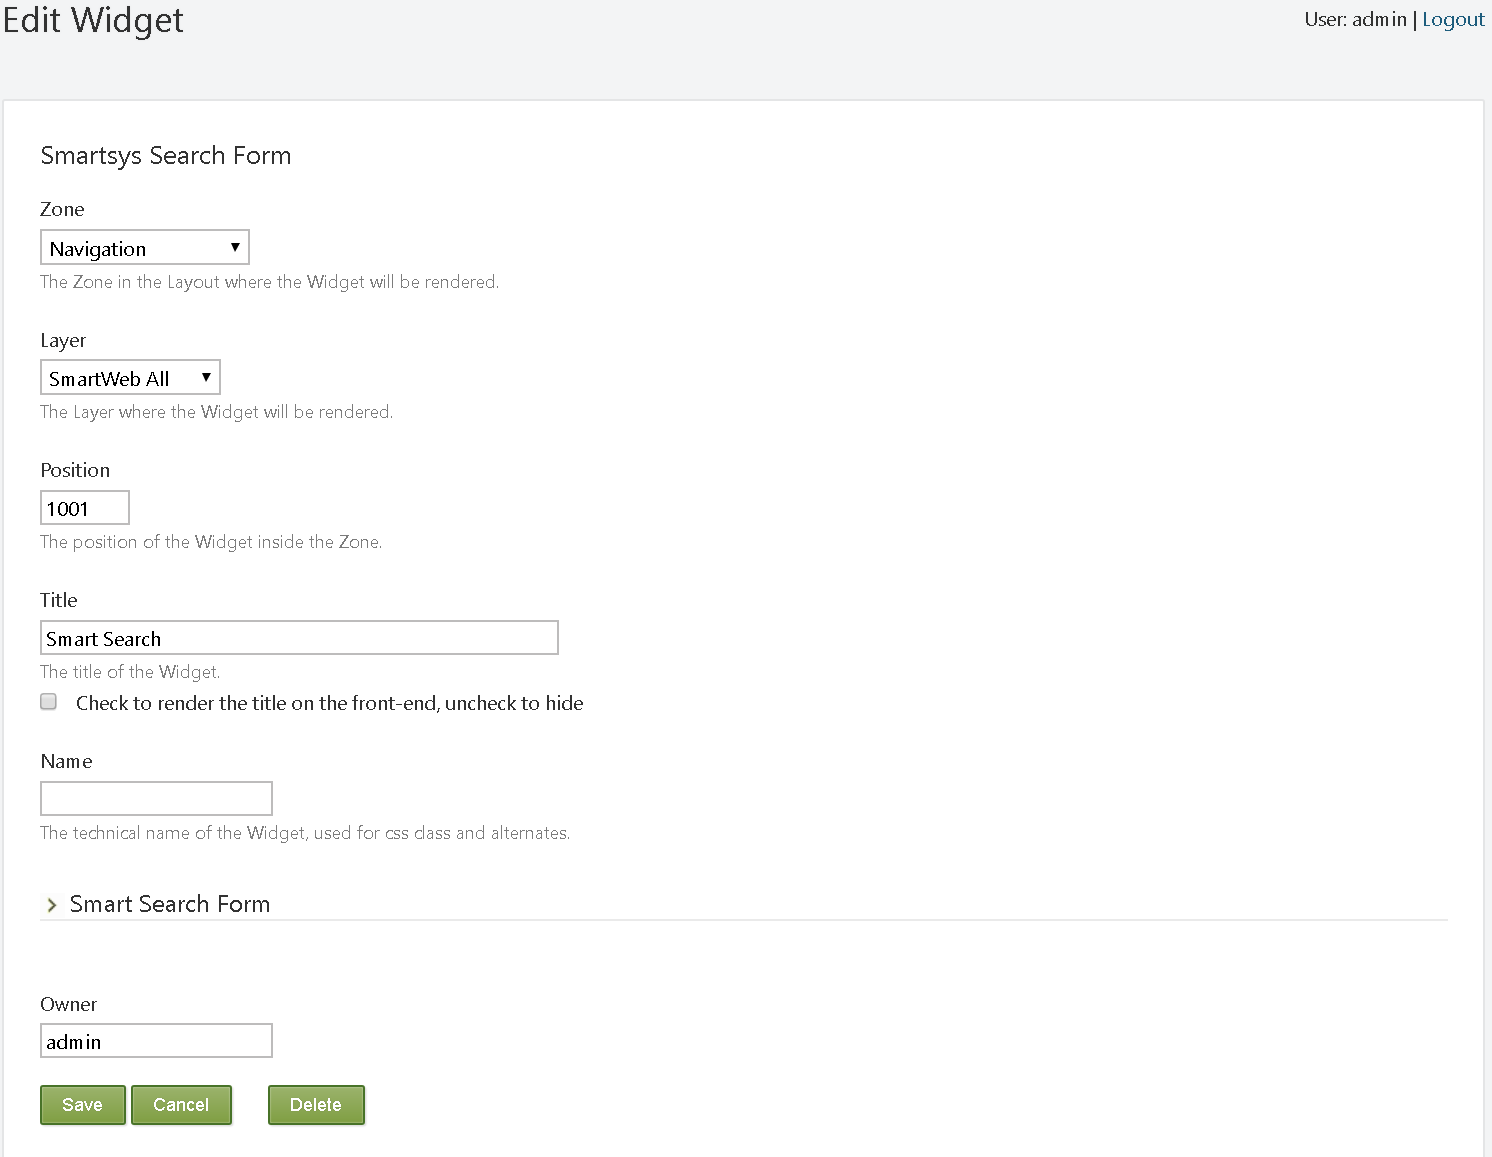
The screen for adding a widget should now be available.
-
The
Zonein the Layout where theWidgetwill be rendered. -
The
Layerwhere theWidgetwill be rendered. -
Position of the
Widgetinside theZone. -
The
titleof theWidget. -
Check to render the
titleon thefront-end. -
The
technical nameof theWidget, used for CSS classes and alternates.

The fields that need to be configured depend on the widget.
However, all widgets have: Zone, Layer, Title, and Position fields. The
Position field determines the relative position of all widgets within
the zone (in effect, z-order). Keep in mind that the widgets within the
zone can come from multiple layers. For example, two different layers
may have widgets assigned to the same zone.
The value of the Position field can be an integer or a sequence of
integers, separated by dots. For example, the following values are all
valid: 5, 10.1, 7.5.3.1. Widgets with lower position values will be
rendered before those with higher values.
After setting the values of the fields, click Save.
Editing or Deleting a Widget
To edit or delete a widget, in the Widgets section, use the Current Layer
drop-down list to select the layer that the widget is assigned to. In
the list of zones, displayed for the layer, click the widget you want to
edit. The the following screen should then be displayed: