Working with Certificates
This chapter is intended to show the user how to create certificate authority (CA), client and server certificates and how to sign them with the CA. For this purpose, we will use a tool named XCA -- free application for certificate and key management (https://hohnstaedt.de/xca/).
Installing XCA
The latest version of XCA can be downloaded here:
https://hohnstaedt.de/xca/index.php/download.
Run the installation package and follow the instructions.
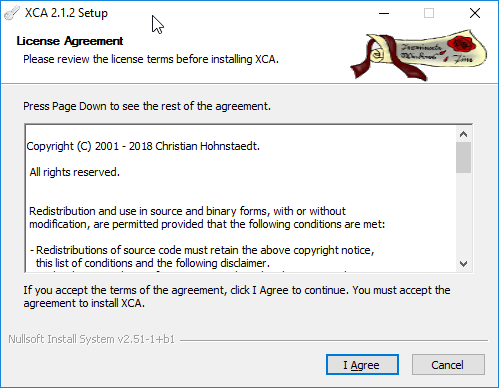
Accept the license agreement and press I Agree.
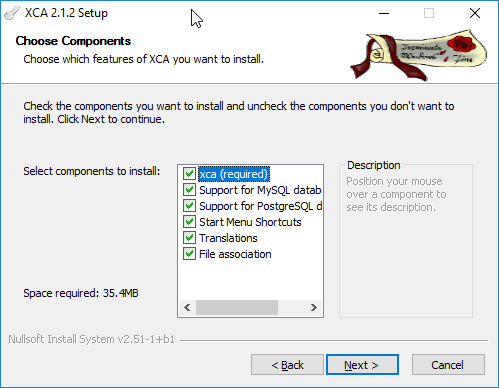
Leave the defaults as shown above and press Next.
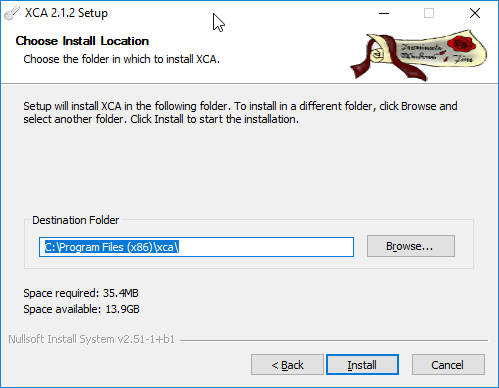
Press Install and wait.
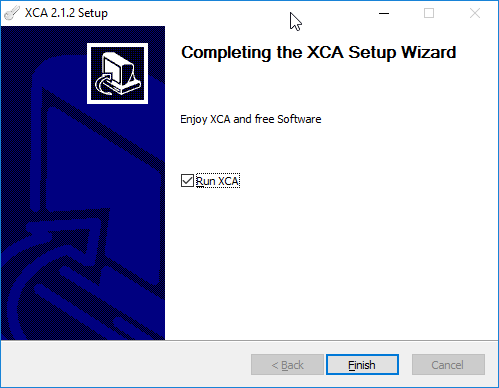
Press Finish.
The X Certificate Key Management tool is now installed.
Creating New XCA Database
The newly installed XCA tool needs a database where it can store certificates.
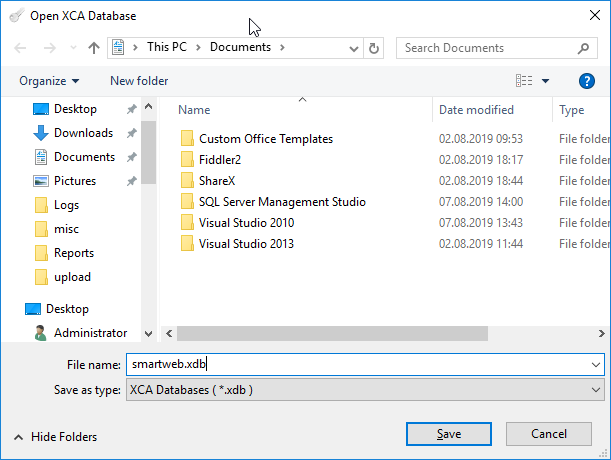
If one is not available, it must be created. From the menu, click on
File>New Database (or use the Ctrl+N shortcut if you wish), choose where
to store the database and press Save.
A password to secure the database will then be requested. The password is optional. For this demo we'll leave it without a password.
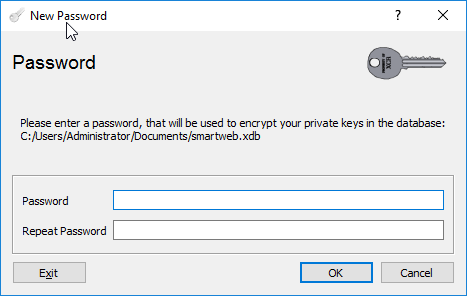
After pressing the OK button, the database will be created.
Creating New Private Keys
In order to create a certificate, the user needs to create private keys for it first. This can be done by navigating to the
Private Keys tab. The private key can then be created via the New Key button.

From here, fill in the name of the key (the type must be RSA and the key size not
lower than 2048) and press the Create button. Using the same approach create
keys with the names - Demo Server and Demo Client. These
three keys are needed for the CA, server and client certificates
accordingly.
Creating Certificate Authority (CA) Certificate
Navigate to the Certificates tab. From the menu on the right side - press
the New Certificate button.
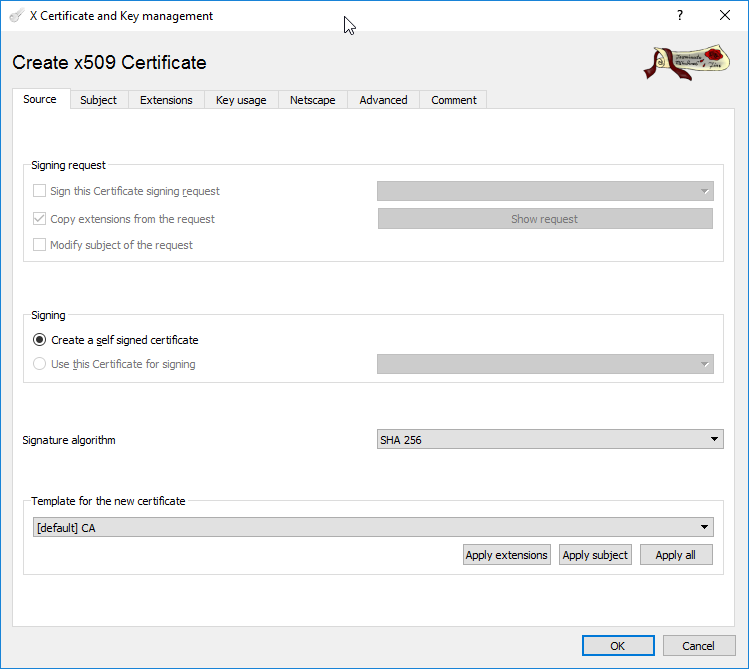
In the Source tab, choose the [default] CA template for the new
certificate and press the Apply extensions button. Ensure that the
Signature algorithm is at least SHA 256. Navigate to the Subject tab and, in the commonName field, enter the common name of the CA's certificate
(e.g. DemoCA).
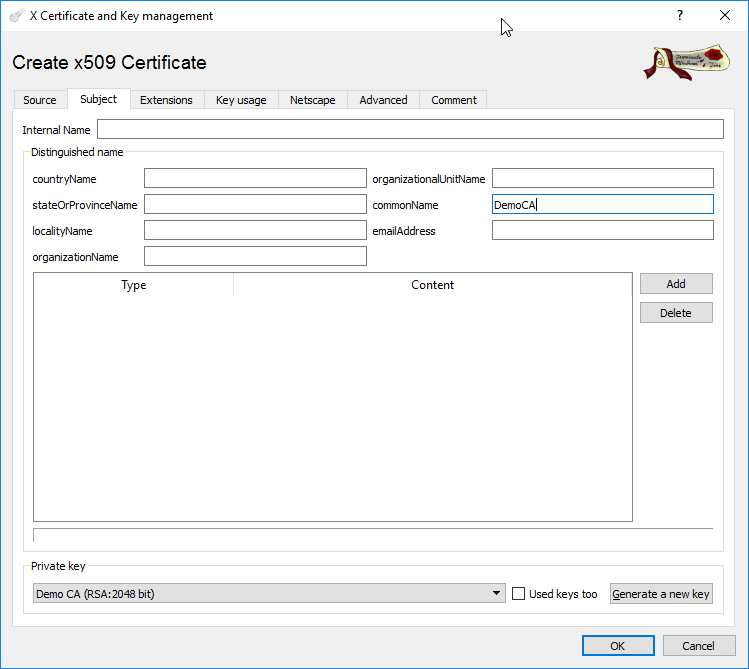
Ensure that the Demo CA key is selected in the Private key dropdown. Navigate to the
Extensions tab and specify the Validity of the certificate. For this example,
we will set the Time range to 20 years - Midnight.
Once the desired Time range has been entered, click the Apply button.
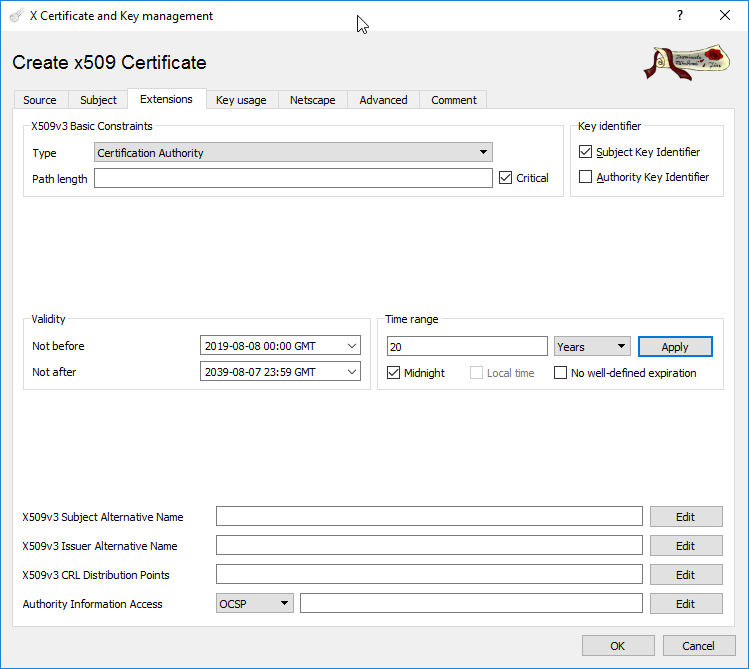
To create the DemoCA certificate, press the OK button.
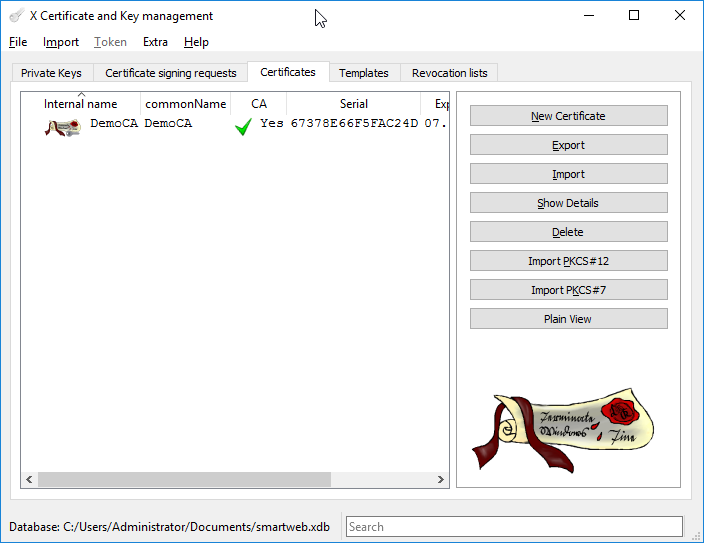
Creating A New Certificate Signed with CA
Navigate to the Certificates tab. From the menu on the right side, press
the New Certificate button.
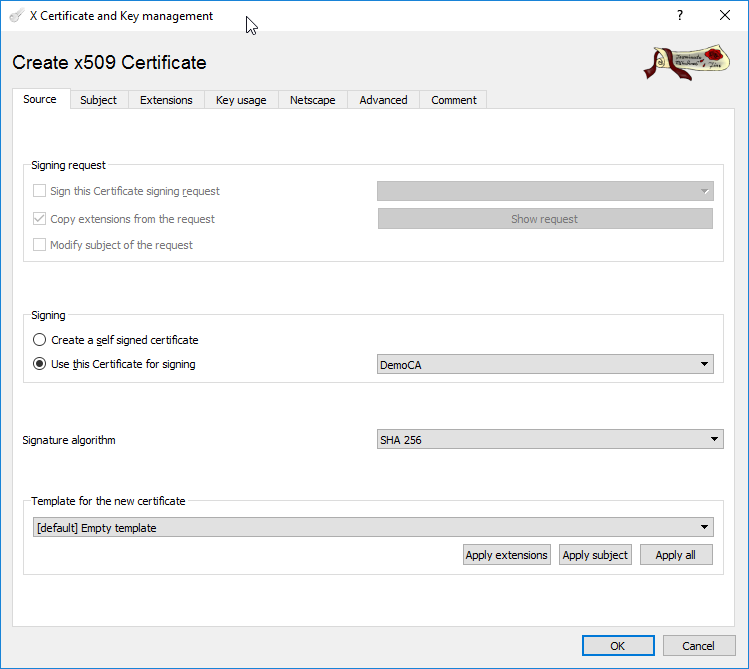
In the Signing section, choose Use this Certificate for signing and
select the newly created CA certificate (DemoCA) from the dropdown list.
Ensure that the Signature algorithm is at least SHA 256.
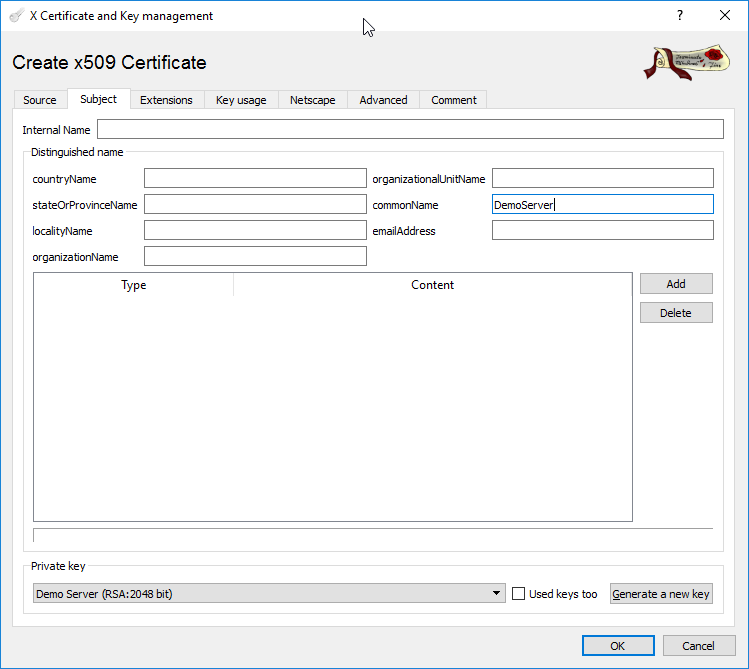
Navigate to the Subject tab. In the commonName field, enter the common
name of the certificate (e.g. DemoServer). Ensure that the Demo Server key is selected in the Private key dropdown.
Navigate to the Extensions tab. Specify the Validity of the certificate.For this example,
we will set the Time range to 20 years - Midnight.
Once the desired Time range has been entered, click the Apply button.
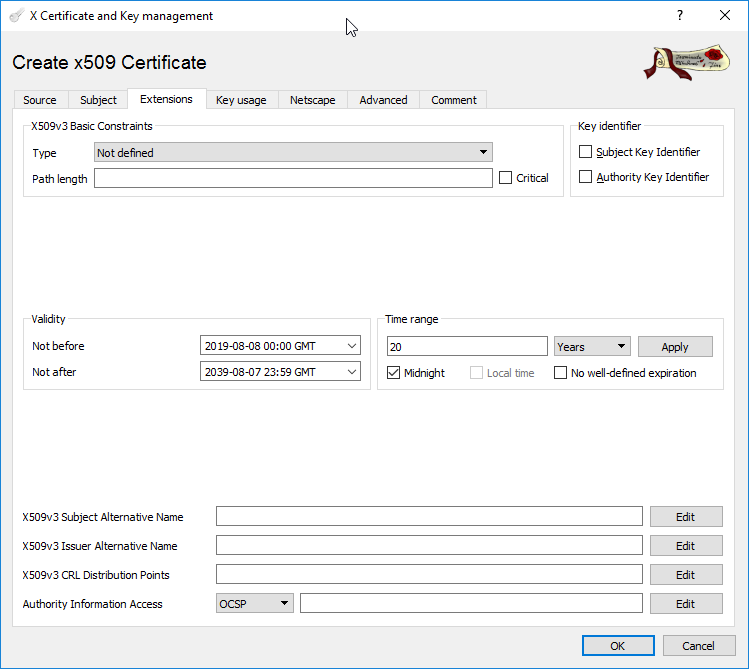
To create the DemoServer certificate, press the OK button.
The following message may appear:
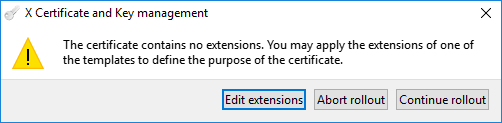
In this case, press the Continue rollout button. The DemoServer certificate will then be
created.
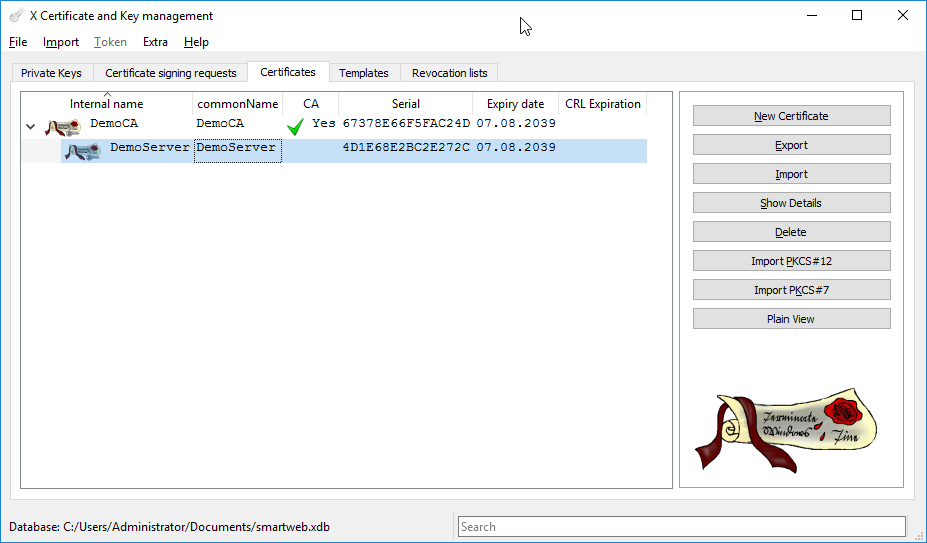
Using the same approach, the client certificate can be created(commonName DemoClient and
Private key Demo Client).
Exporting Certificates
Right click on the newly created DemoCA certificate. From the context
menu, choose Export>File.
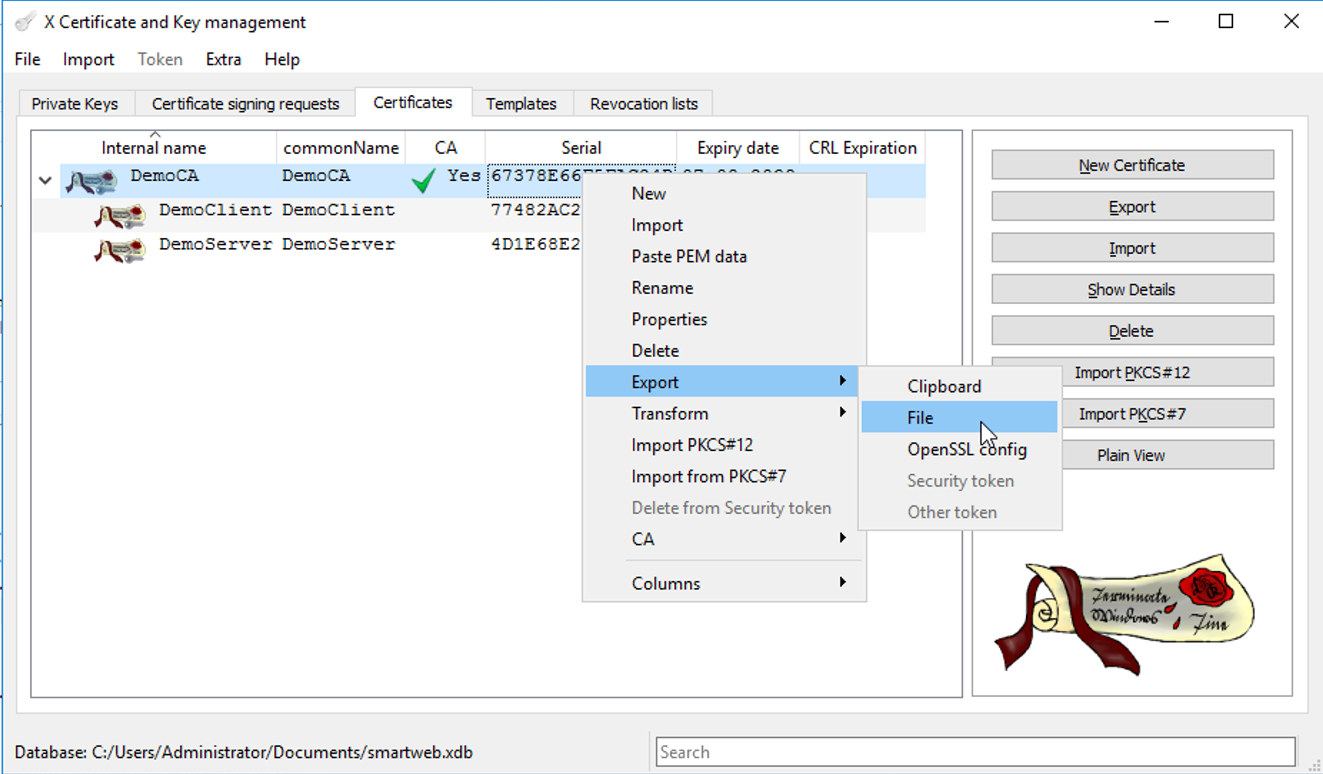

Choose the location where the file will be stored. In the Export Format, choose
DER(*.cer). This format is suitable for exporting CA certificates
without private keys.
Right click on the newly created DemoServer certificate. From the
context menu, choose Export>File.
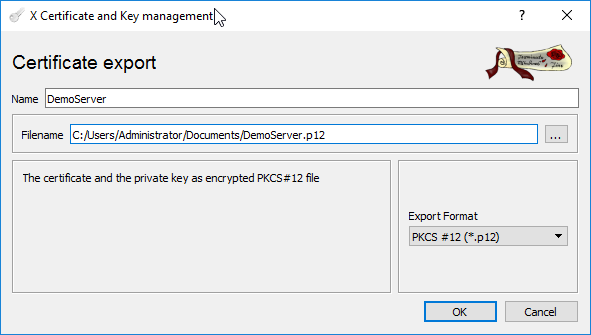
Choose the location where the file will be stored. In the Export Format, choose
PKCS #12``(*.``p12``). This format exports certificates with the
private keys, that's why a password can be set to protect them. If a password is set, the user will be asked for it when importing. For the purposes of this demo, we'll leave the password empty. Press the OK button.
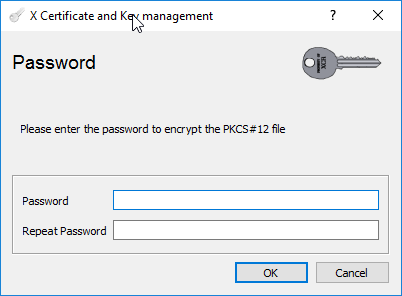
Use the same approach to export the DemoClient certificate.
Importing Certificates in Windows
Before certificates are able to be used by the SmartWEB solution, they
must be imported into the operating system. Open File Explorer and
navigate to the exported certificates from the previous section. Double
click on the DemoCA.cer.
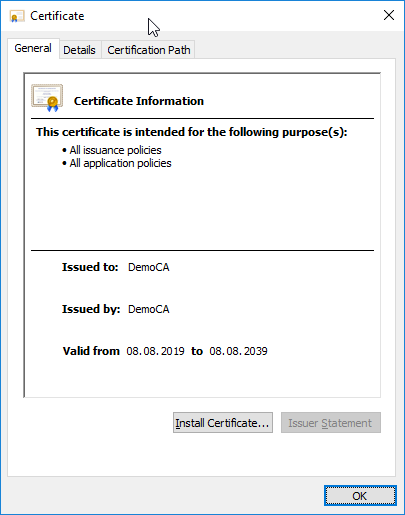
Press Install Certificate.
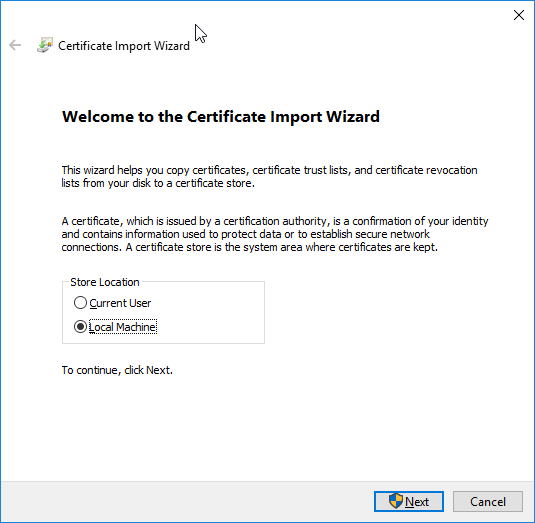
Choose Local Machine and press Next.
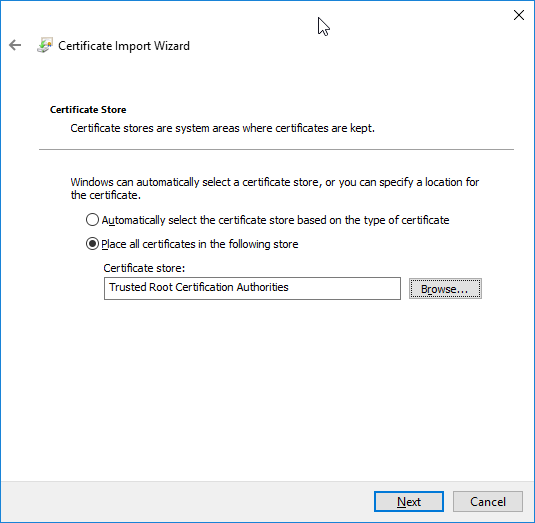
Choose Place all certificates in the following store and press the
Browse button to select
Trusted Root Authorities Certification Authorities. Press Next.
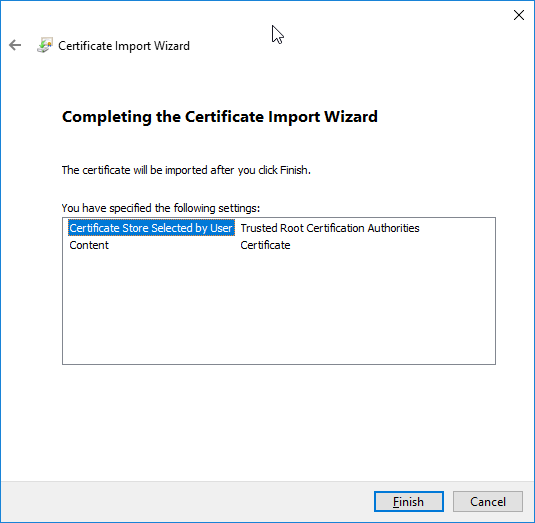
Press Finish.
Now double-click on the DemoServer.p12 certificate. The Certificate Import Wizard will appear.
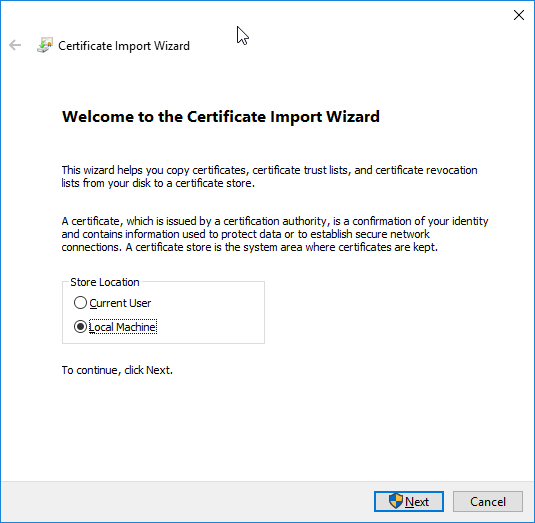
Choose Local Machine and press Next.
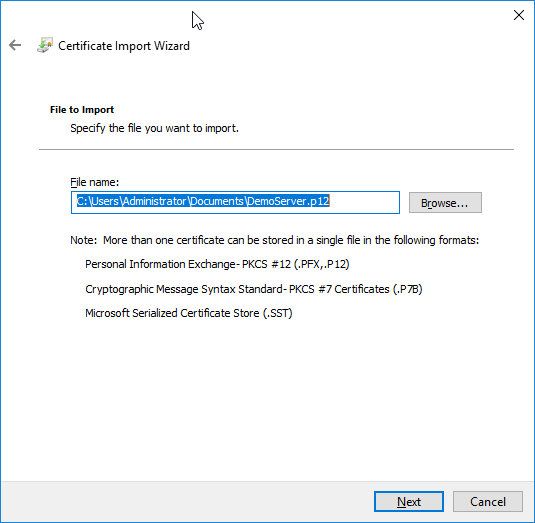
Press Next.
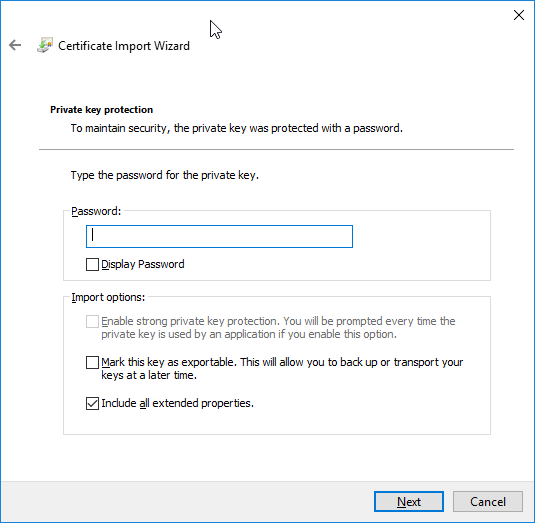
If your certificate is password protected, enter the password or leave
it empty if not. Press Next.
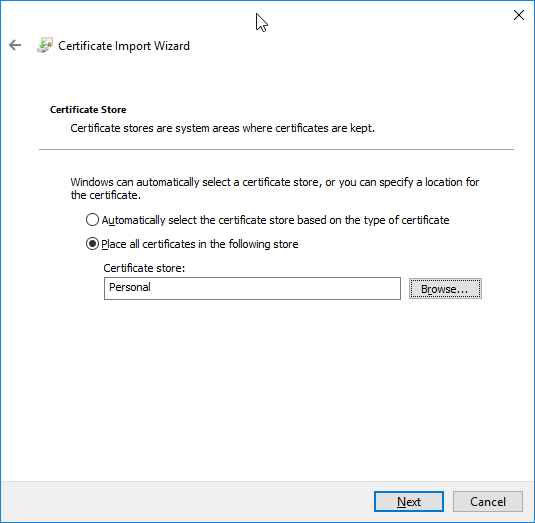
Choose Place all certificates in the following store and press the
Browse button to select Personal. Press Next.
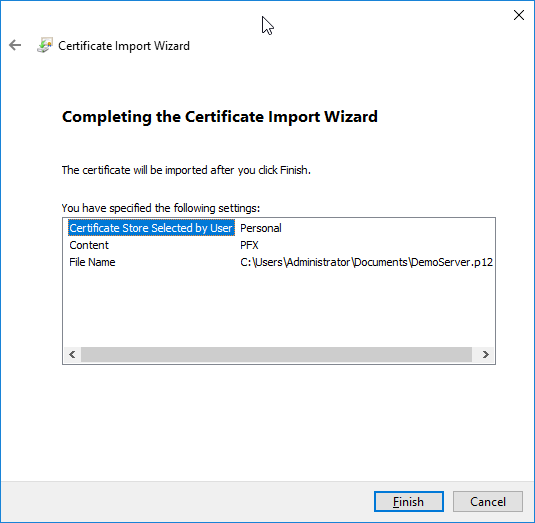
Press Finish.
Use the same approach to import the DemoClient certificate.
Press the Win+R shortcut. Enter certlm.msc and press the
OK button to run it.
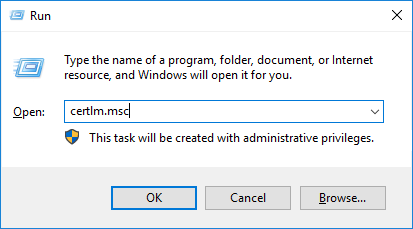
A Local Computer - Certificates MMC snap-in will be shown. You can find the newly
imported DemoCA certificate by navigating to Trusted Root Certification Authorities.
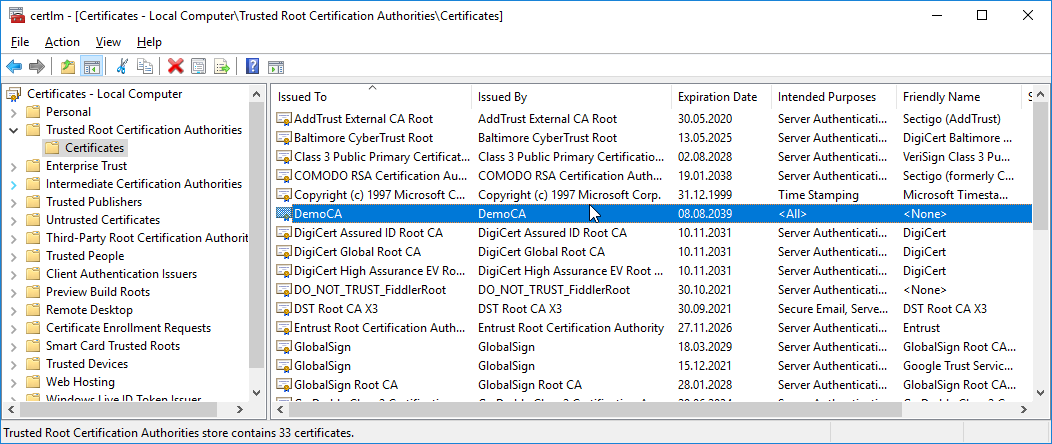
By navigating to the Personal branch, the
DemoServer and DemoClient certificates can be found. Double click on the DemoServer
and then go to the Certification Path tab.
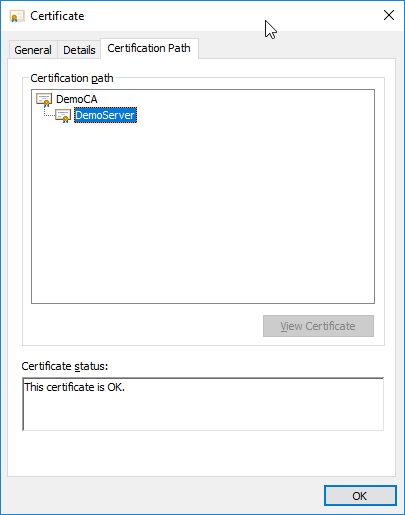
You can see the certification path and DemoCA as the root, the CA that has signed the DemoServer certificate.
Creating Self-Signed Certificate
Self-signed certificates can be used on an intranet. When clients only have to go through a local intranet to get to the server, there is virtually no chance of a man-in-the-middle attack. You can use it on a development sever, there is no need to spend funds on a trusted certificate when you are just developing or testing an application. Also self-signed certificate can be used on a small site that transfers non-critical information.
Open the XCA tool. Create new RSA key pairs (as shown in the begging)
named Self-Signed Demo Server. Go to the Certificates tab and click on
the New Certificate button. In the Signing section choose
Create a self signed certificate.
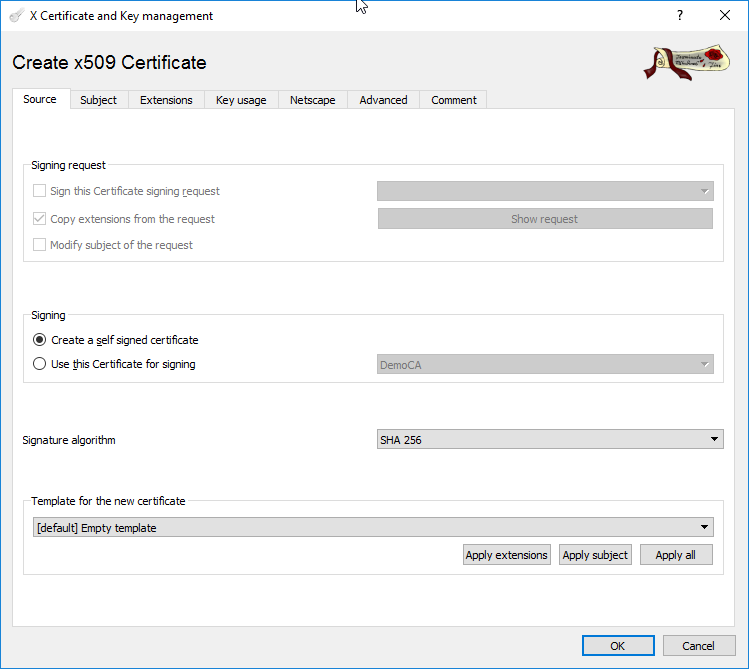
Navigate to the Subject tab. Enter SelfSignedDemoServer in the
commonName field. Ensure that the selected Private key is
Self-Signed Demo Server.
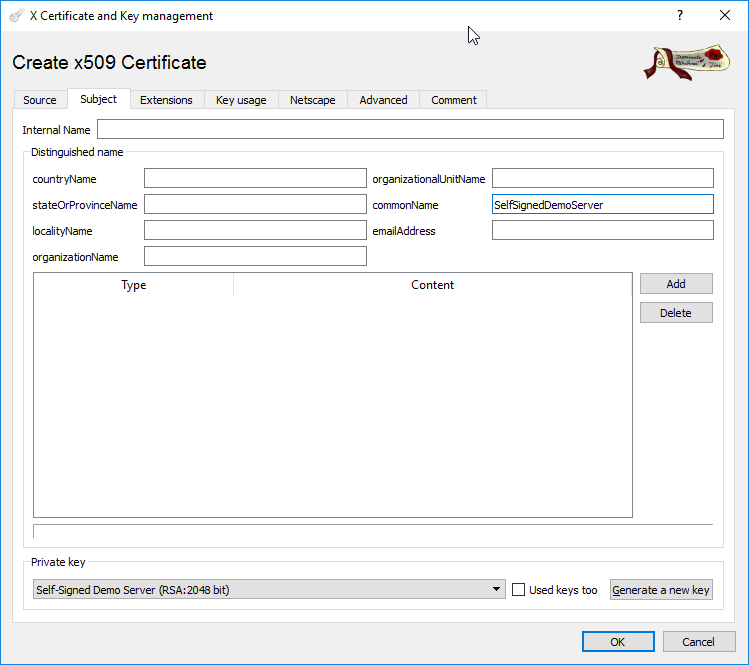
Navigate to the Extensions tab and set the Validity to 10 years (for example purposes).
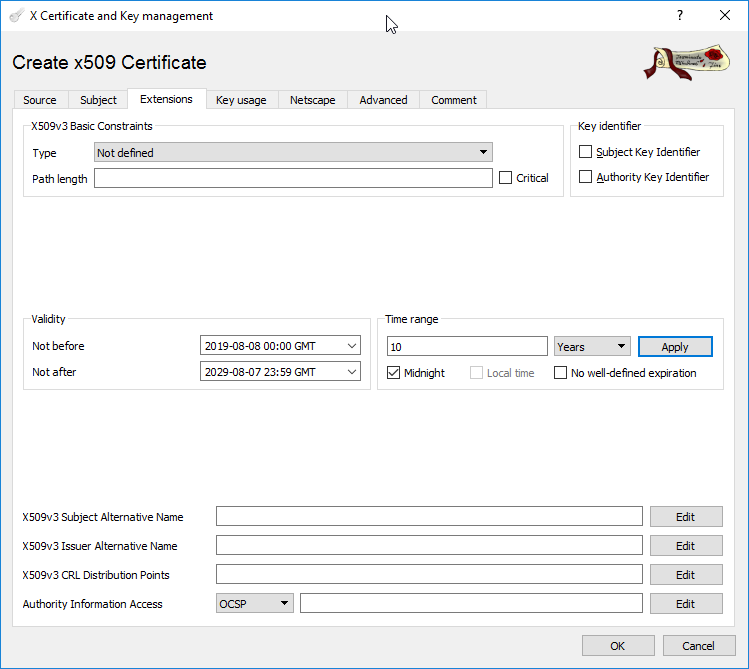
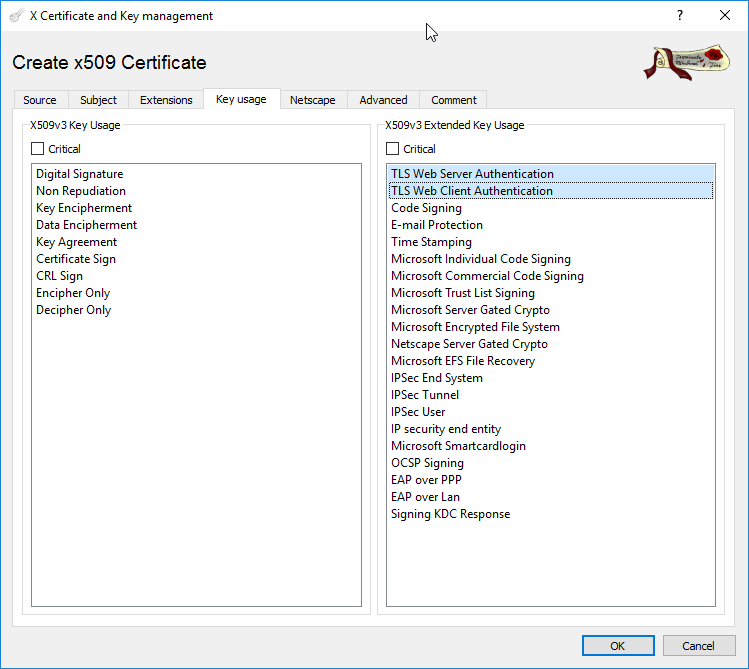
Navigate to the Key usage tab and select TLS Web Server Authentication and TLS Web Client Authentication in X509v3 Extended Key Usage section.
Press OK to finish.
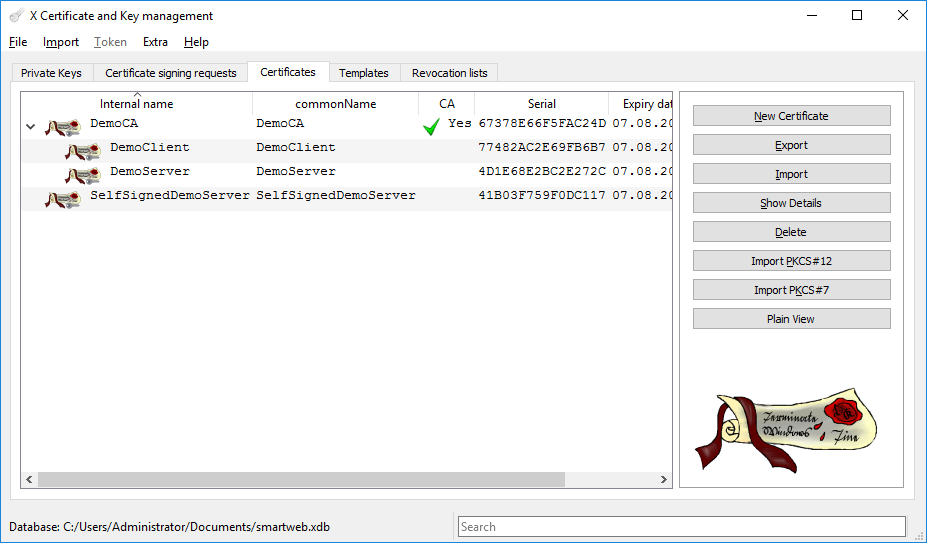
Now export the newly created self-signed certificate in PKCS #12 format
and import it in the Local Computer certificates (in the Personal folder as
explained before).
Note:
You can use it as a certificate for binding HTTPS in IIS,
just keep in mind that visitors will see a warning in their browsers
when connecting to an IIS site that uses a
self-signed certificate until it is permanently stored in their
certificate store in Trusted Root Certificate Authorities.